Hello fellow artists-
A little while back I mentioned I would post tips for shooting flowers. This turned out to be tougher than I thought. I had to break down what had become a organic process for me so I could explain things I did not even realize I was doing. It was a great exercise and mead me even more aware of what I am doing when I go out to shoot flowers.
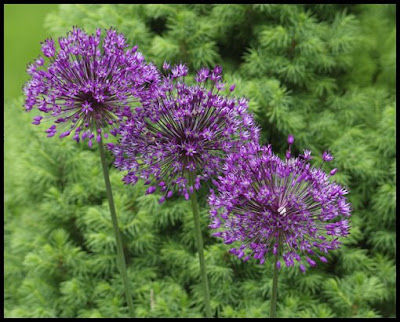
Allium

Dogwood
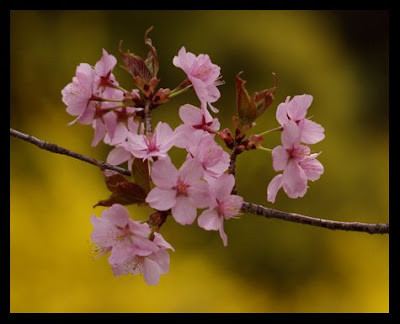
Cherry Blossom
Before I jump into my rules for taking photos of flowers remember they are just guidelines break the rules to suit your needs. Tell me what works for you and what doesn't. This is just how I approach flowers and there are many other successful ways to to it.
5 Flower Photography Tips
Isolate a single flower or small group - Focusing on a single bloom or a small bunch of blooms draws your viewer in. That is half the battle. Once you have the viewers attention do something to keep them interested with design or color etc.
Position the flower(s) in the frame in a way that is interesting - We all make the mistake sometimes of planting the big beautiful flower right in the middle of the frame. You need something else to interest the viewer if you do that. Take advantage of the frame and place the flower in a slight off center more interesting location.
Shoot when the light is right - Noon day light is harsh and straight above your flowers. This gives them a flat shape and often hot highlights that are hard to work with. Early morning or the hour before sunset are wonderful. They give you flattering side light and soft warm color tones.
Be aware of the background and take advantage of it - Once you settle on the perfect bud or flower look at what is behind it in your shoot sometimes a shrub or wall with a complimentary color can really make your image stand out. Always be looking for the best angle to shoot your flower from to make it as interesting as possible.
Shoot with an open aperture (lens opening) - To make things easier I like to use a zoom lens for shooting flowers and can then get different shots without moving my tripod position. By shooting with a wide open (lowest f-stop number) or aperture close to open you really focus attention on your flower and can blur the background giving you a wonderful backdrop for your flower to tell its story.
I hope these small hints help you get out there and take pictures of these beautiful ornaments the Earth shares with us each year. Most importantly use your eye to tell the story you want to. I'd love to see what you come up with.
My Equipment
For those of you interest here are the tools I use to create my images. A point and shot camera shooting jpegs can get similar results if you think about the design, color and time of day to get the most out of your shot.
I use a Canon digital rebel xt (DSLR). This is the very entry level of Canon's Digital SLR line and now that it has been out for several year can be picked up second hand very cheaply compared to the new stuff. It has done great work for me and I am only now tempted to swap up as I want to produce really big images (20x24 and larger). I shoot with 100-300 Canon usm zoom lens. This is not the pricey "L" series lens, but again it has served me very well and has not hindered my artistic vision in the least. A tripod and a cable release are optional, but can help you with those longer exposures you may need to take with the zoom lens. Lastly I use a collapsible reflector that is gold on one side and white on the other to help fill in the shadows a little. You can use a large piece of white poster board just as easily and get great results.
That's it. Good luck get out there and start shooting and let me see what you come up with.
Keep Makin' Art
Carl

